Introduction
Grinding sits between sectioning and polishing in the metallographic workflow, and its job is specific: remove the damage layer left by the saw blade and produce a uniform scratch pattern that polishing can clean up. Get it right and polishing is easy. Get it wrong and no amount of polishing will reveal the true microstructure.
It is possible to create more damage in grinding than in sectioning. Starting with too coarse an abrasive drives deformation deeper into the specimen than the original cut. The better strategy is to cut close to the area of interest with the right blade so you can begin grinding at a finer grit, not coarser.

PACE SiC papers, alumina papers, zirconia papers, diamond grinding disks, and composite disks cover every grinding step from coarse planarization to fine pre-polishing.
Five parameters control grinding outcomes: abrasive type, abrasive bond, grinding speed, grinding load, and lubrication. The rest of this guide walks through each one in the order you will encounter them, then gives PACE's specific consumables, equipment, and material-specific procedures.
Sample Planning
Three decisions matter before the specimen touches the abrasive: where the cut sits, how the mount is oriented, and whether the specimen fits the wheel safely.
SAFETY: 1/3 working wheel diameter is the maximum specimen size. Specimens larger than 1/3 the wheel diameter bind and can be ejected at high speed. This is a personal-injury rule, not a quality recommendation. Do not exceed it.
Where to grind
The cut from sectioning sits about 1-2 mm above the area of interest (2-3 mm for soft, ductile metals). Grinding removes this allowance plus the sectioning damage layer. If you cut closer, you grind less and start at a finer grit. If you cut farther, you spend longer at coarser grits and risk introducing additional damage.
Keep coatings in compression
For coated, plated, or layered specimens, orient the mount so the abrasive direction passes through the coating and into the substrate. This keeps the coating in compression during grinding and prevents spalling at the substrate interface. Same rule as sectioning and mounting.
Rotate 90° between grits
On a belt or stationary paper (unidirectional scratches), rotate the specimen 90° at each grit change. The scratch pattern from the previous step is then perpendicular to the current step, which makes it obvious when the previous pattern has been fully removed. On a rotating platen, scratches are multidirectional, so rotation matters less, but a between-step inspection under good light is still essential.
Grinding Mechanics
Three physics ideas drive every grinding decision: Preston's Law, the abrasive-bond spectrum, and disk-on-disk rotation geometry. Knowing these turns "follow the procedure" into "diagnose what is happening."
Preston's Law
Removal Rate = k × P × V
k = abrasive/material constant, P = pressure, V = velocity
Pressure and velocity multiply. Doubling either roughly doubles material removal. In practice, P is constrained by the specimen (too much pressure deforms soft materials and rounds edges) and V is set by the equipment. The trick is to find the highest P and V the specimen tolerates without introducing damage that the next grit cannot remove.
Abrasive types and hardness
| Abrasive | Knoop HK | Mohs | Crystal structure |
|---|---|---|---|
| Silica | 820 | 6-7 | Hexagonal-trigonal |
| Zircon | 1500 | 7.5-8 | Tetragonal |
| Alumina (α or γ) | 2150 | 8-9 | Hexagonal-rhombohedral |
| Silicon carbide | 2480 | 9.1-9.5 | Hexagonal-rhombohedral |
| Boron carbide | 2750 | 9-10 | Rhombohedral |
| Diamond | 8000 | 10 | Cubic-hexagonal |
Silicon carbide is the metallographic workhorse: very hard, self-sharpening (it cleaves cleanly to expose new edges), and inexpensive. Alumina is slightly softer but tougher, so it resists embedding in soft metals. Zirconia is a tough, self-sharpening alternative that holds up under aggressive removal on hard alloys. Diamond is reserved for ceramics, cemented carbides, and other materials too hard for SiC. For grinding ferrous metals, avoid rigid diamond disks: iron catalyzes diamond conversion to graphite at the cut zone.
Three abrasive bond types
- Fixed abrasive (two-body): abrasive rigidly held in a paper, polymer, or film backing. SiC papers, alumina papers, lapping films, bonded diamond disks. High cut rate, potential for surface and subsurface damage. The most common form in metallographic grinding.
- Free abrasive (three-body): abrasive rolls freely between specimen and lapping plate. Non-aggressive, very flat, slow. Used for lapping hard materials on cast-iron plates. Uncommon in routine metallography.
- Semi-fixed abrasive (hybrid): abrasive temporarily held in an interrupted surface. Better than fixed for brittle materials because the abrasive exposure is lower. PACE's CERMESH metal mesh cloth charged with DIAMAT polycrystalline diamond is the canonical example, used for grinding ceramics, CMCs, and other brittle specimens.
Disk-on-disk rotation: complementary vs. contra
Modern grinder-polishers run two disks: a specimen head and a working wheel. The head can rotate in the same direction as the working wheel (complementary) or the opposite direction (contra). The choice has big consequences.
| Head / Base RPM | Direction | Velocity differential | Use case |
|---|---|---|---|
| 100 / 300-600 | Contra | High | Aggressive gross removal on hard specimens (central pressure machines) |
| 200 / 200 | Complementary (same direction) | Moderate | RECOMMENDED for most applications. Standard for individual-pressure machines. |
| 100 / 100 | Complementary (same direction) | Low | Very brittle or very soft materials |
Complementary rotation cancels the velocity differential at the specimen, which preserves inclusions and brittle phases, produces a uniform finish, and gives a flat surface across the specimen. Contra rotation generates a "hammering" action with much higher cut rates but breaks down inclusions and can wear SiC papers non-uniformly.
Wedge warning. Grinding at -200/+200 RPM (contra direction) with 180-grit or coarser paper on an individual-pressure machine produces a measurable wedge across the specimen face. Match head and base RPM in the same direction and the specimen stays square.
PACE Abrasive Selection
PACE manufactures the full grinding consumable line: silicon carbide papers, alumina papers, zirconia papers, metal-bonded and resin-bonded diamond disks, and pre-charged composite disks. The reference tables below help you pick the right abrasive and grit for the job.
Grit reference: ANSI vs European P-grading
Both systems describe abrasive particle size by mesh-screen openings. The European P-system ignores wire diameter, while ANSI compensates for it. Numbers diverge significantly at the fine end. The "P" prefix marks the European designation.
| ANSI grit (US) | European P-grade | Median particle (µm) |
|---|---|---|
| 60 | 60 | 250 |
| 120 | 120 | 106 |
| 180 | 180 | 75 |
| 240 | P220 | 63 |
| 320 | P360 | 40.5 |
| 360 | P500 | 30.2 |
| 400 | P800 | 21.8 |
| 600 | P1200 | 15.3 |
| 800 | P2400 | 6.5 |
| 1200 | P4000 | 2.5 |
Surface roughness vs. SiC grit (Rc 30 steel)
| SiC grit (ANSI) | Surface roughness Ra (µm) |
|---|---|
| 60 | 1.40 |
| 240 | 1.00 |
| 400 | 0.32 |
| 600 | 0.175 |
| 1200 | 0.02 |
The big drop in surface roughness happens between 600 (P1200) and 800 (P2400). Below 600, papers are made by electrostatic-discharge coating, which orients abrasive sharp-edge-up. Above 600, papers are slurry-coated with abrasive bound in epoxy, producing much lower abrasive exposure and the finer finish you see in the table. This is why metallographic fine-grit papers outperform industrial fine-grit papers.
SiC papers (PACE catalog)
The default abrasive for most grinding sequences. Available in grits 60 through 1200, PSA or plain backing, four diameters.
| Grit range | Available sizes | SKU pattern |
|---|---|---|
| 60, 80, 120, 180 (coarse) | 8″, 10″, 12″, 14″ | SIC-{grit}P{size}-100 (PSA) or SIC-2{size}-{grit} (plain) |
| 240, 320, 360, 400, 600 (medium-fine) | 8″, 10″, 12″, 14″ | SIC-{grit}P{size}-100 (PSA) or SIC-2{size}-{grit} (plain) |
| 800, 1000, 1200 (fine, slurry-coated) | 8″, 10″, 12″, 14″ | SIC-{grit}P{size}-100 (PSA) |
Full SiC paper catalog with stock and pricing →
Alumina papers (PACE ALO series) and the shortcut tip
Alumina is tougher than SiC and resists fracturing into soft specimens. For soft non-ferrous metals (aluminum, copper, brass), alumina dramatically reduces embedded-abrasive defects.
Shortcut: one P500 or P1200 alumina paper can replace the full SiC sequence of 240, 320, 400, and 600 grit for planarization of soft and medium-hard metals. The result is fewer grinding steps and faster overall prep, especially on soft non-ferrous specimens where SiC tends to embed.
| P-Grade | Equivalent ANSI | Available sizes | SKU pattern |
|---|---|---|---|
| P120 | ~120 | 8″, 10″, 12″ | ALO-120P{size}-100 (PSA) or ALO-2{size}-P120 (plain) |
| P220 | ~240 | 8″, 10″, 12″ | ALO-220P{size}-100 (PSA) or ALO-2{size}-P220 (plain) |
| P500 | ~360 | 8″, 10″, 12″ | ALO-500P{size}-100 (PSA) or ALO-2{size}-P500 (plain) |
| P1200 | ~600 | 8″, 10″, 12″ | ALO-1200P{size}-100 (PSA) or ALO-2{size}-P1200 (plain) |
Zirconia papers (PACE ZR series)
Zirconia alumina is exceptionally tough and self-sharpening through micro-fracturing rather than gross cleavage. Long paper life on stainless steels, nickel-based superalloys, titanium, and other hard-to-machine specimens. Cost-effective for production environments processing large batches of tough materials.
| Grit | Available sizes | SKU pattern |
|---|---|---|
| 120 (coarse) | 8″, 10″, 12″ | ZR-120P{size}-25 (PSA) |
| 220 (medium) | 8″, 10″, 12″ | ZR-220P{size}-25 (PSA) |
Diamond grinding disks (PACE DIA series)
For ceramics, cemented carbides, ceramic matrix composites, and hard non-ferrous alloys (titanium, zirconium). Do not use rigid diamond disks on ferrous metals; iron catalyzes diamond's conversion to graphite at cut-zone temperatures and the disk degrades rapidly.
Two bond types: metal-bonded for aggressive material removal and long life, resin-bonded for finer surface finish and lower subsurface damage. Both available in PSA or magnetic backing.
| Bond | Particle sizes | SKU pattern |
|---|---|---|
| Metal-bonded (aggressive) | 250 µm, 125 µm, 75 µm, 40 µm, 30 µm, 15 µm | DIA-M{size}-{08/10/12}-{PSA/MAG} |
| Resin-bonded (finer finish) | 125 µm, 70 µm, 35 µm, 25 µm, 15 µm, 9 µm | DIA-R{size}-{08/10/12}-{PSA/MAG} |
PACE composite disks: ORION and SIRIUS
Pre-charged diamond grinding disks that eliminate manual abrasive charging. Both have magnetic steel backings and require a compatible magnetic platen.
- SIRIUS (9 µm diamond): replaces the standard 320, 400, and 600 grit SiC grinding steps. SKU: SIRIUS-MD{08/10/12}. Run at 200/200 RPM complementary.
- ORION (3 µm diamond): fine grinding bridge into final polishing. SKU: ORION-MD{08/10/12}. Run at 100/100 to 150/150 RPM complementary.
A typical composite-disk workflow uses SIRIUS to replace 320-600 SiC steps, then ORION to bridge into polishing. Supplement with DIAMAT diamond suspension in the matching particle range (3-6 µm for ORION, 6-15 µm for SIRIUS) to extend cutting action. Do NOT apply oxide suspensions (alumina, colloidal silica) to diamond-charged disks.
CERMESH semi-fixed grinding for ceramics
CERMESH is a metal mesh cloth used as a semi-fixed abrasive carrier. Pre-charged with DIAMAT polycrystalline diamond suspension, it grinds brittle ceramics and CMCs without the subsurface damage that fixed-abrasive diamond disks introduce.
CERMESH procedure: apply the cloth to a flat base, pre-charge with DIAMAT, start at 50% of normal force to planarize the specimen against the cloth (full force tears the mesh), then ramp force up gradually. Add suspension as needed. Rinse with water at the end of the cycle.
Grinding Procedure
With abrasive selected and machine configured, the actual grinding work breaks down into force, motion, lubrication, time, and cleaning between steps.
Force
For manual grinding, applied force runs about 5 to 15 lbs (20 to 65 N) per specimen, depending on mount size and material. Don's lab data shows the optimum force is around 15 lbs for a 1″ specimen, but most procedures specify 5 lbs because automated machines with multiple stations cap total force at 60-90 lbs across all heads (air compressor limits).
Use these principles regardless of the target number:
- Coarse grits (120-240): Firm, steady force for efficient stock removal. Higher force extends paper life as abrasive dulls.
- Medium grits (320-400): Moderate force focused on replacing the previous scratch pattern uniformly.
- Fine grits (600+): Lighter force to minimize subsurface deformation going into polishing.
- Friable specimens (nodular cast iron, MMCs): Slightly higher force with low velocity differential helps retain inclusions and secondary phases that would otherwise pull out.
Semi-automated systems with programmable force (PACE FEMTO autopolisher heads) remove the operator-to-operator variability that dominates manual force application.
Motion
- Hand grinders (PENTA-5000A): Push the sample in smooth, unidirectional strokes against the SiC roll, covering the full belt width so the paper wears evenly.
- Belt grinders (PENTA-7500S): Same principle, larger working surface for high-volume removal.
- Manual platens (NANO series): Hold the specimen firmly against the rotating disc and traverse gently from center to edge so the paper wears uniformly.
- Semi-automated heads (FEMTO): The head controls motion and force. Set head and base RPM to match in the same direction; refer to the rotation table above.
Whatever the motion, keep contact uniform across the specimen face. Concentrating force on one area gives differential removal, edge rounding, and relief at phase boundaries.
Manual Grinding. Dr. Donald Zipperian demonstrates sample orientation, motion, and pressure control on the PENTA-7500S belt grinder and PENTA-5000A hand grinder.
Automated Grinding and Polishing. Programming and operating the NANO-1000S manual polisher with the FEMTO-1100S autopolisher head for consistent, programmable results.
Lubrication
Continuous lubricant flow during grinding removes heat, flushes swarf, prevents the abrasive from loading, and reduces friction. Three options:
- Water: the default for nearly all metallographic grinding. Cheap, effective, readily available.
- Water with surfactant: improves wetting and swarf removal. Helpful for materials prone to abrasive loading.
- Oil-based: required for water-reactive metals (magnesium, lithium, sodium alloys) and some specialty applications where water would cause corrosion or chemical reaction with the specimen.
Time per step
No universal time-per-step rule applies. Visual inspection of the scratch pattern is always the better indicator. Most grinding steps fall in the 1-2 minute range, modified by:
- Material hardness (harder materials wear paper faster but remove material slowly)
- Amount of damage to remove from the previous step
- Mount diameter and specimen size
- Applied force and equipment type
Don's lab data shows that SiC paper cut rate halves within 2 minutes at 240 grit on a 1″ steel specimen. After the first minute, increasing force gives no additional cut-rate advantage. If you're still grinding after 2-3 minutes and not seeing progress, the paper is glazed; replace it.
Cleaning between steps
Carryover of a coarse abrasive particle to a finer grit produces a deep scratch that the finer grit cannot remove. The deep scratch is easily mistaken for "insufficient grinding" and wastes a lot of time. Clean carefully between every grit change:
- Rinse the specimen under running water to remove loose debris
- Ultrasonic cleaning for 30-60 seconds is the gold standard when available
- Dry before placing on the next abrasive
- Clean hands and the sample holder; they transfer contaminants
Measure stock removal: the ball-bearing trick
For heat-treated parts where over-grinding ruins the surface hardness test, embed a 1/8″ or 1/4″ steel ball bearing in the mount alongside the specimen. Measuring the bearing's exposed segment diameter through grinding (low-power microscope or microhardness filar) directly tells you how much material has been removed. Trigonometry does the rest: known sphere diameter, observed chord diameter, calculated depth.
Material-Specific Sequences
Six material categories cover almost every metallographic grinding job. Each has a recommended abrasive sequence based on the material's hardness, ductility, and brittleness. Where Don's procedure differs from a generic SiC progression, the difference matters: starting with the wrong abrasive embeds particles in soft metals or fractures inclusions in brittle ones.
| Material category | Examples | Recommended sequence |
|---|---|---|
| Soft non-ferrous | Aluminum, copper, brass, zinc, precious metals (PACE Class 1) | P1200 alumina (or 600 SiC) → 800 SiC → 1200 SiC. Start with alumina to avoid embedding. |
| Soft ferrous | Mild steel, low-carbon steel | 240 SiC → 320 → 400 → 600 → 800 → 1200. Shortcut: P500 or P1200 alumina replaces the 240-600 SiC steps. |
| Hard ferrous | Hardened tool steels, case-hardened steels (PACE Class 8) | 120 or 180 SiC for heavy planarization → 240 → 320 → 400 → 600 SiC. Expect faster paper wear; replace as cut rate drops. |
| Super alloys and hard non-ferrous | Titanium, Inconel, Hastelloy, zirconium alloys (PACE Class 6) | 240 SiC → 320 → 400 → 600 → 800 → 1200. Zirconia paper (ZR-220) is a tough alternative for the coarse step on production-volume work. |
| Engineered ceramics | Alumina, zirconia, silicon nitride, SiC ceramic (PACE Class 10) | Semi-fixed CERMESH cloth charged with DIAMAT polycrystalline diamond. Start at 50% normal force, ramp up gradually. Match grit to grain size; coarse diamond damages brittle phases. |
| Metal matrix composites | Al-SiCp, Al-B4Cp, MMC seal rings (PACE Class 9) | Planarize the soft matrix first with SiC. Secondary grinding focuses on the hard reinforcement: diamond grinding disks or CMP polishing. |
Why alumina for soft non-ferrous metals
Silicon carbide is brittle and self-sharpening, which is exactly the property you want on hard ferrous metals but exactly wrong for soft non-ferrous metals. The fractured SiC fragments embed in the soft surface and show up as artifacts during microscopy and microhardness testing. Alumina is tougher, fractures less, and resists embedding. For aluminum, copper, brass, zinc, and precious metals, alumina at the coarse step is the difference between a usable specimen and one that needs to be reground.
Why composite disks (ORION / SIRIUS) accelerate medium-hard work
For routine work on mild steel and super alloys, the composite disk workflow replaces multiple SiC steps with two diamond steps. SIRIUS (9 µm) covers what 320, 400, and 600 SiC would do; ORION (3 µm) bridges into polishing. The disks are pre-charged, don't require paper changes, and run on the same NANO grinder-polisher as your other consumables. Higher upfront cost; faster prep, fewer paper changes, longer effective working life.
Work-hardening materials need extra attention
Austenitic stainless steels, nickel-based alloys, and other work-hardening materials build a deformation zone deeper than the visible scratch pattern suggests. Each grit step must remove not only the scratches from the previous step but also the deformation underneath them. Use moderate steady force, replace abrasives more often than you would for non-hardening alloys, and check the final surface against the polishing step to confirm no carry-over deformation remains.
Troubleshooting
Most grinding problems trace back to abrasive choice, force/velocity setting, or contamination. Use the table below to narrow down the cause before changing your sequence.
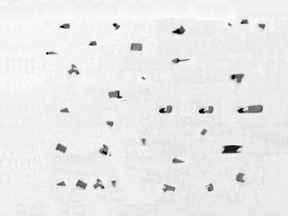
Proper grinding preserves true microstructural features like these oxide inclusions. Poor technique (contamination, embedded abrasive, excessive deformation) obscures or mimics features and makes accurate analysis impossible.
| Symptom | Common causes | Fix |
|---|---|---|
| Scratches from a coarser grit will not remove |
|
|
| Excessive deformation or smearing |
|
|
| Embedded abrasive (particles in the polished face) |
|
|
| Uneven grinding across specimen (wedge or tilt) |
|
|
| Excessive machine vibration |
|
|
| Edges round over |
|
|
| Contamination from previous steps |
|
|
PACE Grinding Equipment
PACE manufactures the equipment for every grinding workflow, from low-budget manual hand grinders to fully programmable automated polishing heads with abrasive dispensers and recirculating filtration.
Hand and belt grinders

PENTA-5000A Hand Grinder
Five-station hand grinder fitted with silicon carbide rolls. The default first-purchase grinder for new labs and the workhorse for student or quick-turn work.

PENTA-7500S Belt Grinder
Heavy-duty belt grinder with powerful motor and water cooling. High-volume material removal and the right tool for coarse planarization of hard ferrous specimens.
Manual grinder-polishers
The NANO series uses dynamic torque servo motors and variable speed control to run the full grinding-and-polishing sequence on a single machine. Available in single-wheel, double-wheel, and large-wheel configurations.

NANO-1000S / NANO-2000S / NANO-1200S
Single-wheel (1000S), double-wheel (2000S), or large-wheel (1200S) manual grinder-polishers. Variable speed, programmable cycles, compatible with all PACE grinding consumables including composite disks.

FEMTO Autopolisher Heads
Programmable polishing heads that attach to NANO manual polishers. Variable head speed 0-300 RPM, individual-force or individual/central-force configurations. Removes operator-to-operator variability from grinding force and makes complementary-rotation procedures reproducible.
View the full PACE grinding and polishing equipment lineup →
Frequently Asked Questions
What is the biggest sample I can grind safely?
No larger than 1/3 the diameter of the working wheel. This is a personal-injury safety rule, not a quality recommendation. When a specimen exceeds 1/3 of the wheel diameter, the velocity changes too rapidly as the specimen crosses the wheel center, the holder binds, and the specimen can be ejected. An 8″ wheel handles specimens up to about 2.5″; a 12″ wheel handles up to about 4″. Beyond that, switch to a larger machine or section the specimen into smaller pieces before mounting.
Can I skip grit sizes to save time?
No, and skipping grits is the single most common cause of "won't polish out" problems downstream. Each grit must remove not just the visible scratches from the previous step but also the deformation layer underneath them, which runs roughly 3 to 5 times the abrasive particle diameter. Jumping from 240 to 600 leaves a deformation layer that no amount of 600-grit grinding can clear; you have to grind back through and start over. The shortcut is not skipping grits; it is switching to alumina papers that cover the equivalent of four SiC steps in one paper, or using ORION/SIRIUS composite disks that span what SiC would do in three steps. Skip the abrasives, not the steps.
Why does alumina paper outperform SiC on soft non-ferrous metals?
Silicon carbide is brittle by design. It cleaves cleanly to expose sharp new cutting edges, which is exactly what you want on hard ferrous metals. On soft non-ferrous metals (aluminum, copper, brass, zinc, precious metals), the fractured SiC fragments embed in the soft surface and show up as artifacts during microscopy and microhardness testing. Alumina is tougher, resists fracturing, and resists embedding. For Class 1 specimens, alumina at the coarse step is the difference between a usable mount and one that needs reground.
Can one alumina paper really replace four SiC steps?
Yes, for soft and medium-hard metals on flat starting surfaces. A single P500 or P1200 alumina paper can replace the 240, 320, 400, and 600 SiC sequence used for planarization. The savings come from alumina's higher abrasive durability at fine grit sizes plus the elimination of three paper changes (each with its own cleaning step). The alumina shortcut does not apply when you need very heavy stock removal (still requires coarse SiC) or when surface roughness specifications demand the full SiC progression to 1200 grit.
When should I use diamond grinding disks instead of SiC papers?
Diamond grinding disks are the right tool for ceramics, cemented carbides, ceramic matrix composites, and hard non-ferrous alloys (titanium, zirconium). Use metal-bonded disks (DIA-M series) for aggressive removal and long disk life, resin-bonded (DIA-R series) for finer surface finish and lower subsurface damage. Do NOT use rigid diamond disks on ferrous metals: iron catalyzes diamond's conversion to graphite at cut-zone temperatures and the disk degrades rapidly. For ferrous work, stay with SiC, zirconia, or composite disks (ORION/SIRIUS).
Why does Don recommend complementary rotation at matched RPM?
Complementary rotation (head and base spinning the same direction at the same RPM) cancels the velocity differential at the specimen, which preserves inclusions and brittle phases, gives a uniform finish across the specimen, and produces a flat (not wedged) mount face. Contra rotation produces higher cut rates through a "hammering" action but breaks down inclusions and wears SiC papers non-uniformly. For most metallographic work, 200/200 RPM complementary is the right starting point. Contra is reserved for aggressive gross removal on hard specimens using central-pressure machines, where the higher cut rate justifies the trade-offs.
How do I measure stock removal during grinding?
Mount a 1/8″ or 1/4″ steel ball bearing alongside your specimen in the mount. As grinding removes material, the ball is also ground, exposing a circular face whose diameter directly indicates depth removed. Measure the exposed chord diameter with a low-power microscope or microhardness filar; trigonometry (known sphere diameter, observed chord) gives the depth. This is the standard trick for surface-hardness work where over-grinding ruins the test, and it requires no special equipment beyond the bearing itself.
How do I know when my paper needs to be replaced?
SiC paper cut rate halves within about 2 minutes at 240 grit on a 1″ steel specimen. The visual signs of a worn paper: glaze (a shiny, reflective look on the abrasive surface), darkening (loaded with material), or no visible scratch pattern change after a full minute of grinding. If you find yourself applying more force just to get "normal" cutting action, the paper is past its useful life. Fresh paper is cheap compared to the time wasted on glazed paper. For automated production runs, expect 2 to 3 specimens per coarse paper and 5 to 8 per fine paper as rough planning numbers.
Why won't these deep scratches go away no matter how long I grind?
Deep persistent scratches almost always come from contamination, not insufficient grinding time. The two most common causes: a particle of coarse abrasive was carried over to a finer step (insufficient cleaning between grits), or an embedded particle from a previous specimen is sitting on the platen. The fix is process, not more time. Ultrasonic clean the specimen and holder for 30 to 60 seconds between every grit change, wipe down the platen, and replace the paper if you suspect it picked up a contaminant. If the scratches persist, drop back one grit to clear them, then advance again with clean equipment.
What's Next: Polishing
With the specimen ground to a uniform 600 or 1200 grit finish and the damage layer from sectioning removed, the next step is polishing. Polishing removes the fine scratch pattern left by grinding and produces a mirror finish ready for etching and microscopy. The grinding step you just finished sets up the polishing step: if grinding left deformation or non-uniform scratches, polishing has to undo them before it can do its own work.